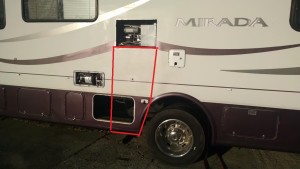
 When we bought our Coachmen Mirada last fall, we knew it had a big delamination under the frig. It didn’t look to serious as I had repaired water damage and delamination before, so I kind of knew what we were getting into.
Although the Mirada was in very good condition, this delamination and damage was probably the reason it sat on the dealers lot for months and wasn’t moving. We made sure to point out to the dealer the delamination was a very significant problem, but we were able to accept it, for a price. Thats probably why we got a very, very good deal on this Mirada.
Fast forward to today. The weather finally warmed up enough so we could tackle the problem. and I had all the components I was going to need to tackle this job.
The exterior walls are made up of a sandwich, The exterior skin is fiberglass sheet bonded to a 3/16 plywood substrate to give it a little firmness. This is then bonded to a frame made of of 1x2s. The frame has 1 inch Styrofoam insulation inside tucked in all the holes. This provides insulation and some structural qualities. This is then bonded to the interior 1/4 plywood, that has vinyl finish on the inside to make it look pretty.
The water damage was sever, the interior plywood, the frame structure, and the exterior plywood were all rotted away in the area immediately below the frig. This allowed the fiberglass exterior to just dangle in the breeze with not support.
HOW DID THIS DAMAGE HAPPEN?
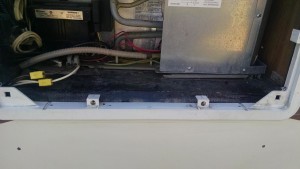
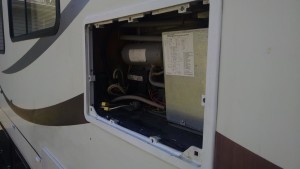
When I took the exterior cover off of the frig, it was plain and simple how the water was getting in. There is no lip on the bottom of the frig cover. When it rained, water would run down the side of the motorhome, run down the frig cover, drip onto the bottom of the frame. with n o lip on the bottom of the frame, the was free run inside and drip into the frig compartment. The original compartment had a thin vinyl cover on the walls and floor of the compartment, so the water would probably pool. After a couple good freeze/thaw cycles, the water started getting under the vinyl, and after a few years, the vinyl was no longer glued to the wood. The water could now flow down into the wall and the rotting process started.
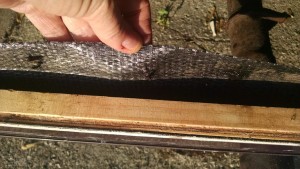
You can see here how we repaired the frig cover to prevent this from happening again. If you have a frig cover, like this one, you better check yours.
SEE THIS LINK for a short story on how we fixed the frig cover frame.
2) The delamination damage was basically everything under the frig, including the baggage door frame. It was completely rotted out on the top, right side, and bottom.
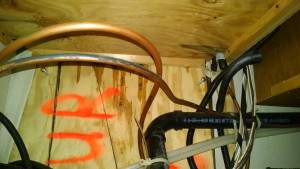
3) The interior wall was rotted away below the frig. The exterior fiberglass was rotted away, I used a 2 ft long flat metal ruler and dug out all the rotted wood and frame structure.
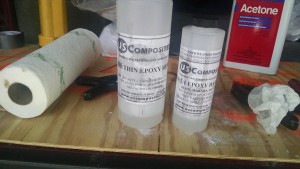
4) I was going to replace the interior and exterior plywood. Plywood would be slid up between the fiberglass and the styrofoam to complete one side of the sandwich. Then I would cut the interior wall plywood and slide it up on the inside of the styrofoam. These sandwich pieces would be coated in epoxy, and the new sandwich would be squeezed together with several bolts to hold it while the epoxy cured.
Before I slide the plywood up, I did a test fit to make sure everything would fit. I had to cut the interior and exterior plywood into two pieces so it would slide up into the cavities. I then made up a couple batches of what called “flox”, Epoxy with cotton fibers added for strength.
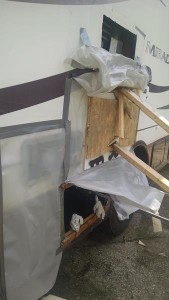
5) I covered the exterior with heavy plastic sheet to protect the fiberglass and keep any epoxy from sticking to the exterior surface.
I then cut a large oversize piece of 3/4 plywood that would serve as a temporary clamp to the outside of the fiberglass. This would not only help clamp the sandwich together , it would also be used to push the whole side of the Mirada so the exterior fiberglass would be even with the old existing fiberglass.
6) Once everything was epoxied and the new plywood was in place, I put the oversize plywood against the exterior and drilled three holes through the sandwich from the outside all the way to the inside. I used bolts and nuts to squeeze the sandwich together. One of the bolt holes was the TV antenna connection, and the other two were measured carefully 2 inches down from the bottom of the frig door. These holes are symmetrical and after the job is finished, I just put stainless bolts in the holes and it looks like they are factory installed, holding something up.
7) I cut new 1×2 frame members for the cargo compartment door frame, and epoxied and clamped these into place along with the exterior 1/4 inch plywood..
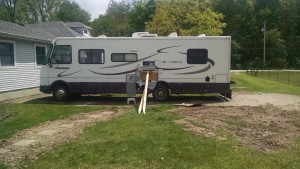
Once everything was clamped I used a couple long 2×4 to press against the side of the Mirada.
COMPLETE
I let the epoxy cure for a couple days, then removed all the fixtures. I re-installed all the covers and a new Antenna outlet connector thing.
Most important, I added a lip to the bottom of the frig access door so water cannot get in again.


hi my names Kerry i have a 2002 same as yours and the same problem, with the exception that my cargo do is still ok, any other advice as i will do it myself also.
i have never done this kind of repair on a motorhome..have fixed transoms on boats and such
and tip would be well appreciated
thanking you in advance Kerry
on my repair after looking at it I decided to put in an access door, I purchased one on eBay for about 60 dollars an 18″ x 22″ big enough to get rid of all the delam and damaged area… after marking it all out I used a dremil tool with a diamond cutting blade to cut through the fiberglass where I had it marked out.
I then rebilt the framing with cedar 1x2s and glued it all up with pl400 glue. installed the new door which now gives me access to my plumbing, furnace and some electronics.
I took out my cable and phone connections as well and just tucked them inside as there not used any longer.
after rebuilding the framing around the fridge area I put under belly tape call (scrim tape) along the edge where the fridge door opening is and then used as much self leveling caulking as I needed to seal it all in.
end result problem is repaired and I now have a new access door.
not sure how to put pictures on here but if you want to get in touch with me on here I would be glad to send pictures to you
Kerry